
Cupboard with a divider and outlet cut-out
36 × 24 inReal buildPromptMake me a 36 by 24 inch cupboard with a divider and shelves, a back that tabs in, and a cut-out for an outlet.
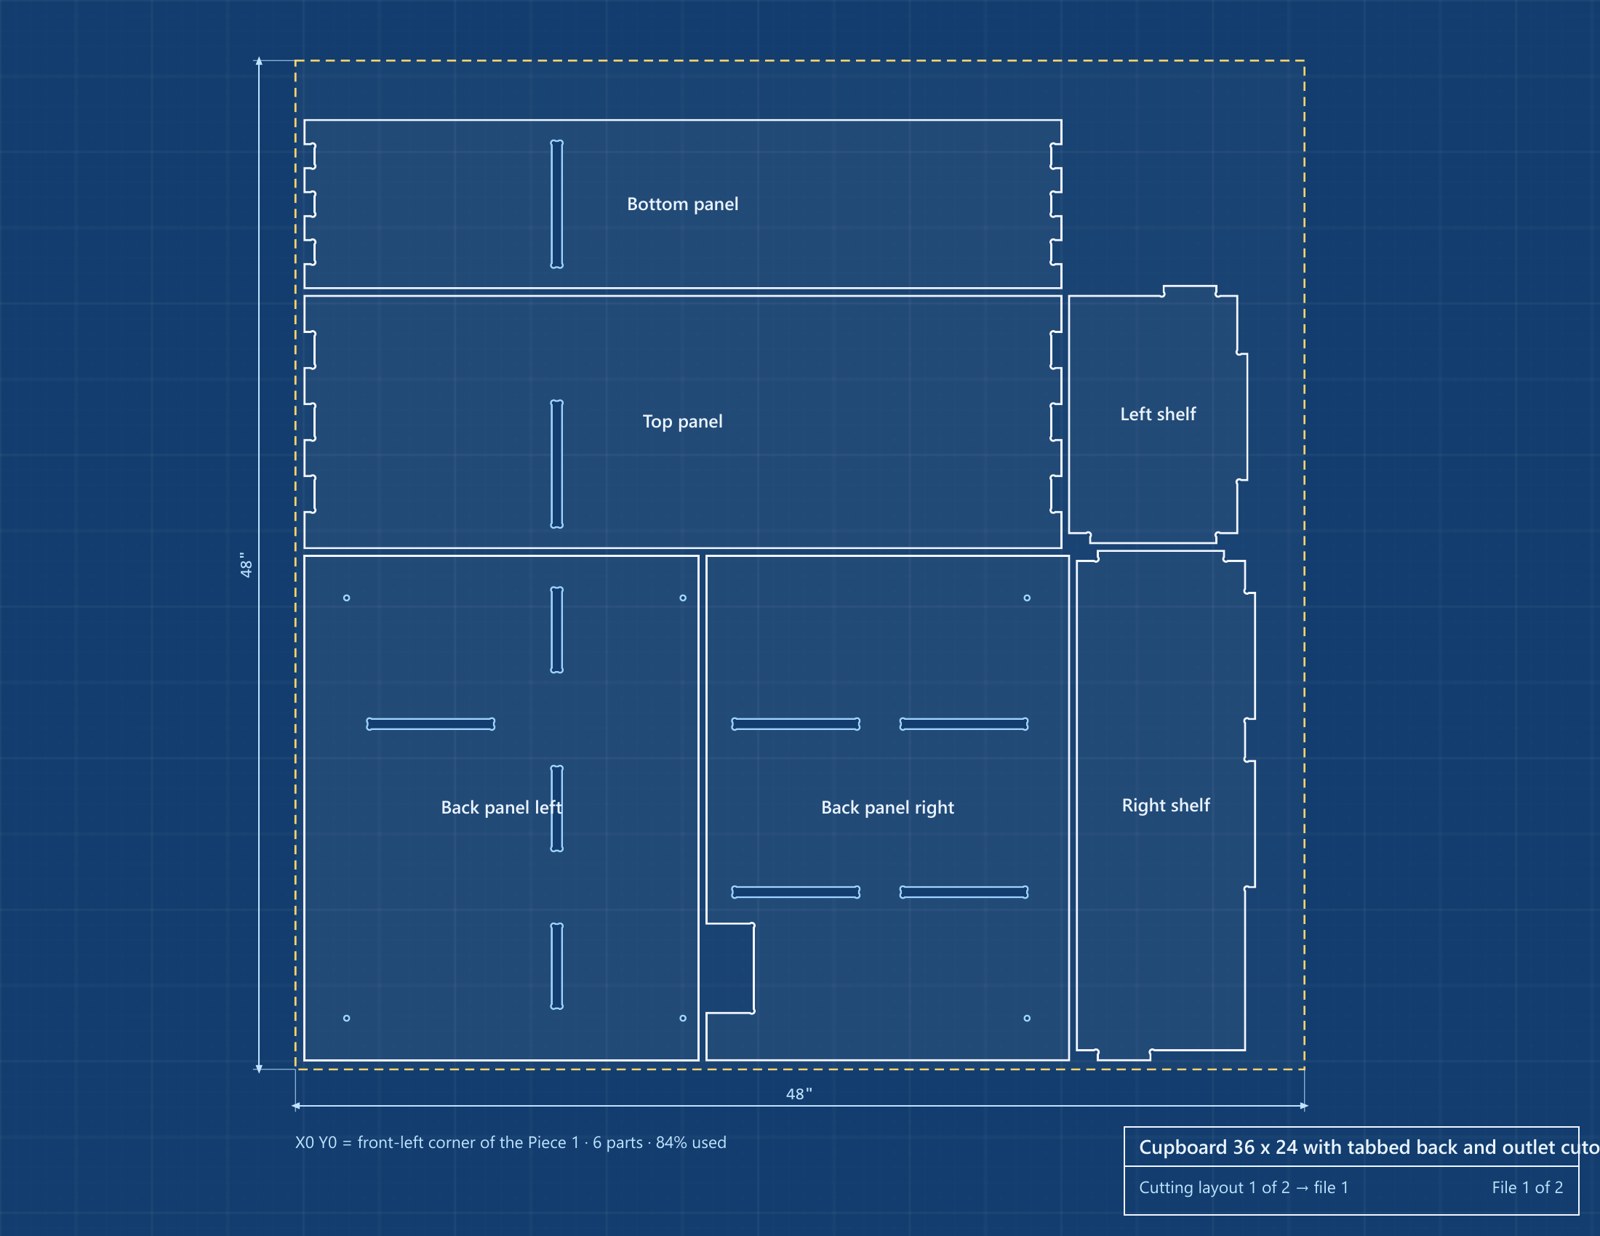
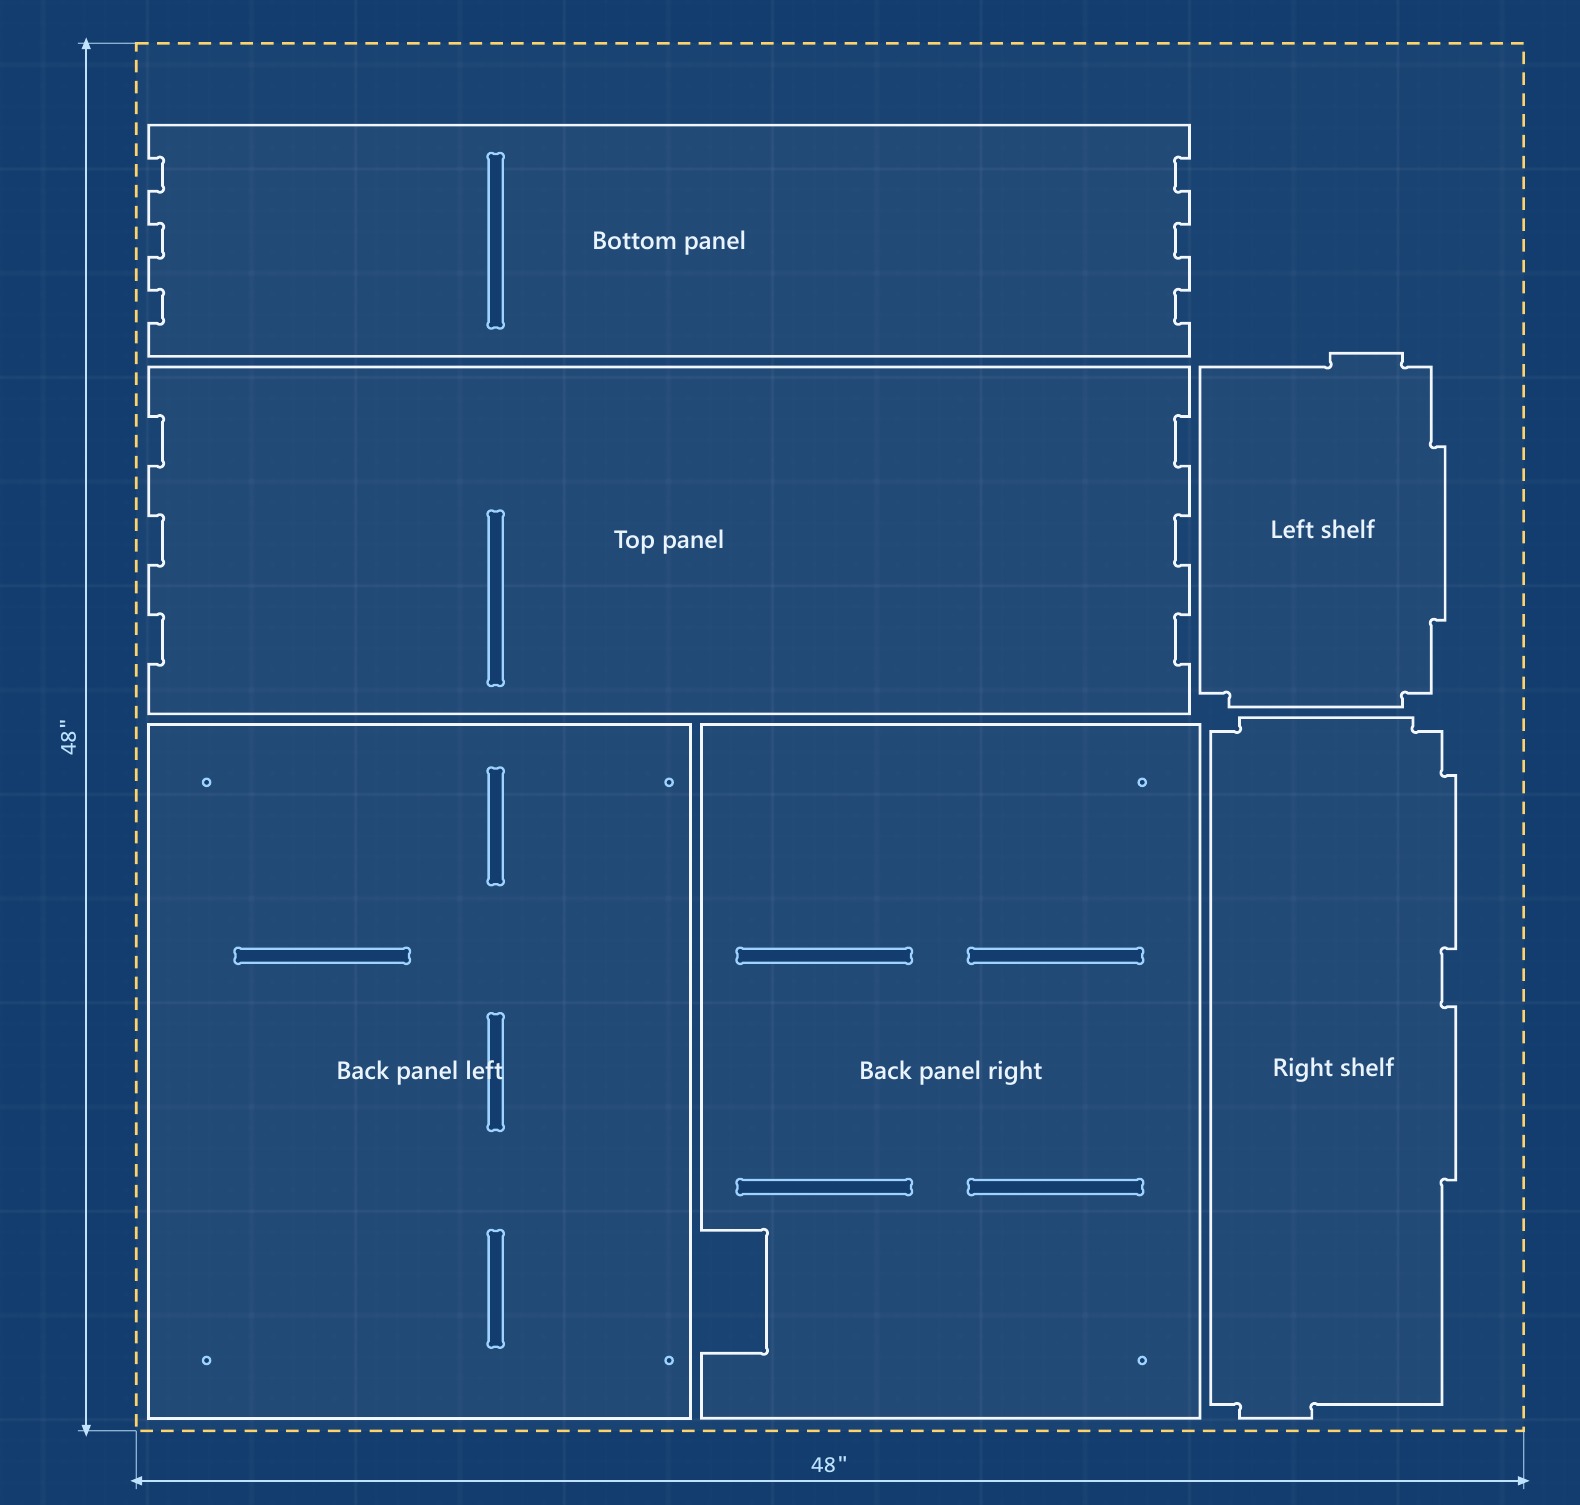
Designed in Cutline, cut from two 48 × 48 in sheets of 1/2 in plywood, and put together with glue and brad nails. The notch in the back clears a wall outlet.
10parts
2sheets, 48 × 48 in
1/2 inplywood (0.478 in measured)
Fingerjoints, tabs and mortises
Cut list, assembly steps and G-code
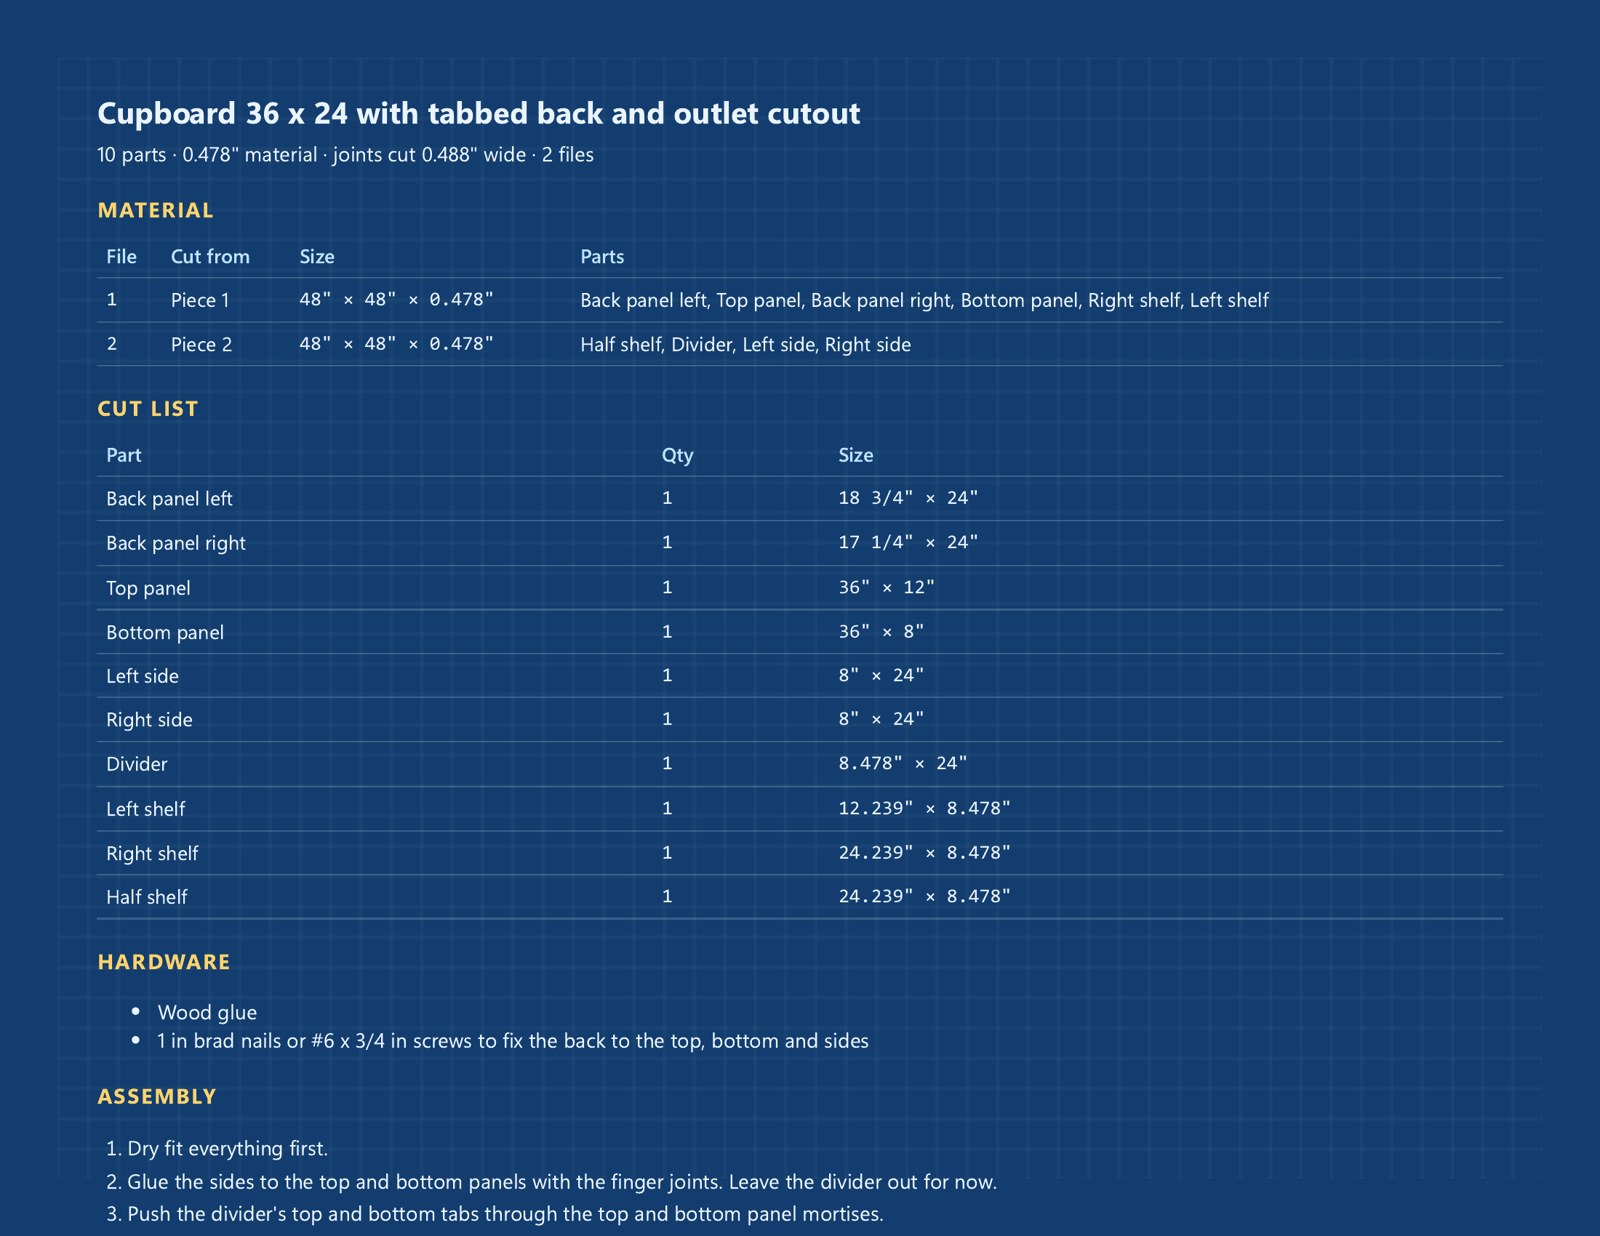
Cut list
| Part | Qty | Size |
|---|---|---|
| Back panel left | 1 | 18 3/4 × 24 in |
| Back panel right | 1 | 17 1/4 × 24 in |
| Top panel | 1 | 36 × 12 in |
| Bottom panel | 1 | 36 × 8 in |
| Left side | 1 | 8 × 24 in |
| Right side | 1 | 8 × 24 in |
| Divider | 1 | 8.478 × 24 in |
| Left shelf | 1 | 12.239 × 8.478 in |
| Right shelf | 1 | 24.239 × 8.478 in |
| Half shelf | 1 | 24.239 × 8.478 in |
Joints
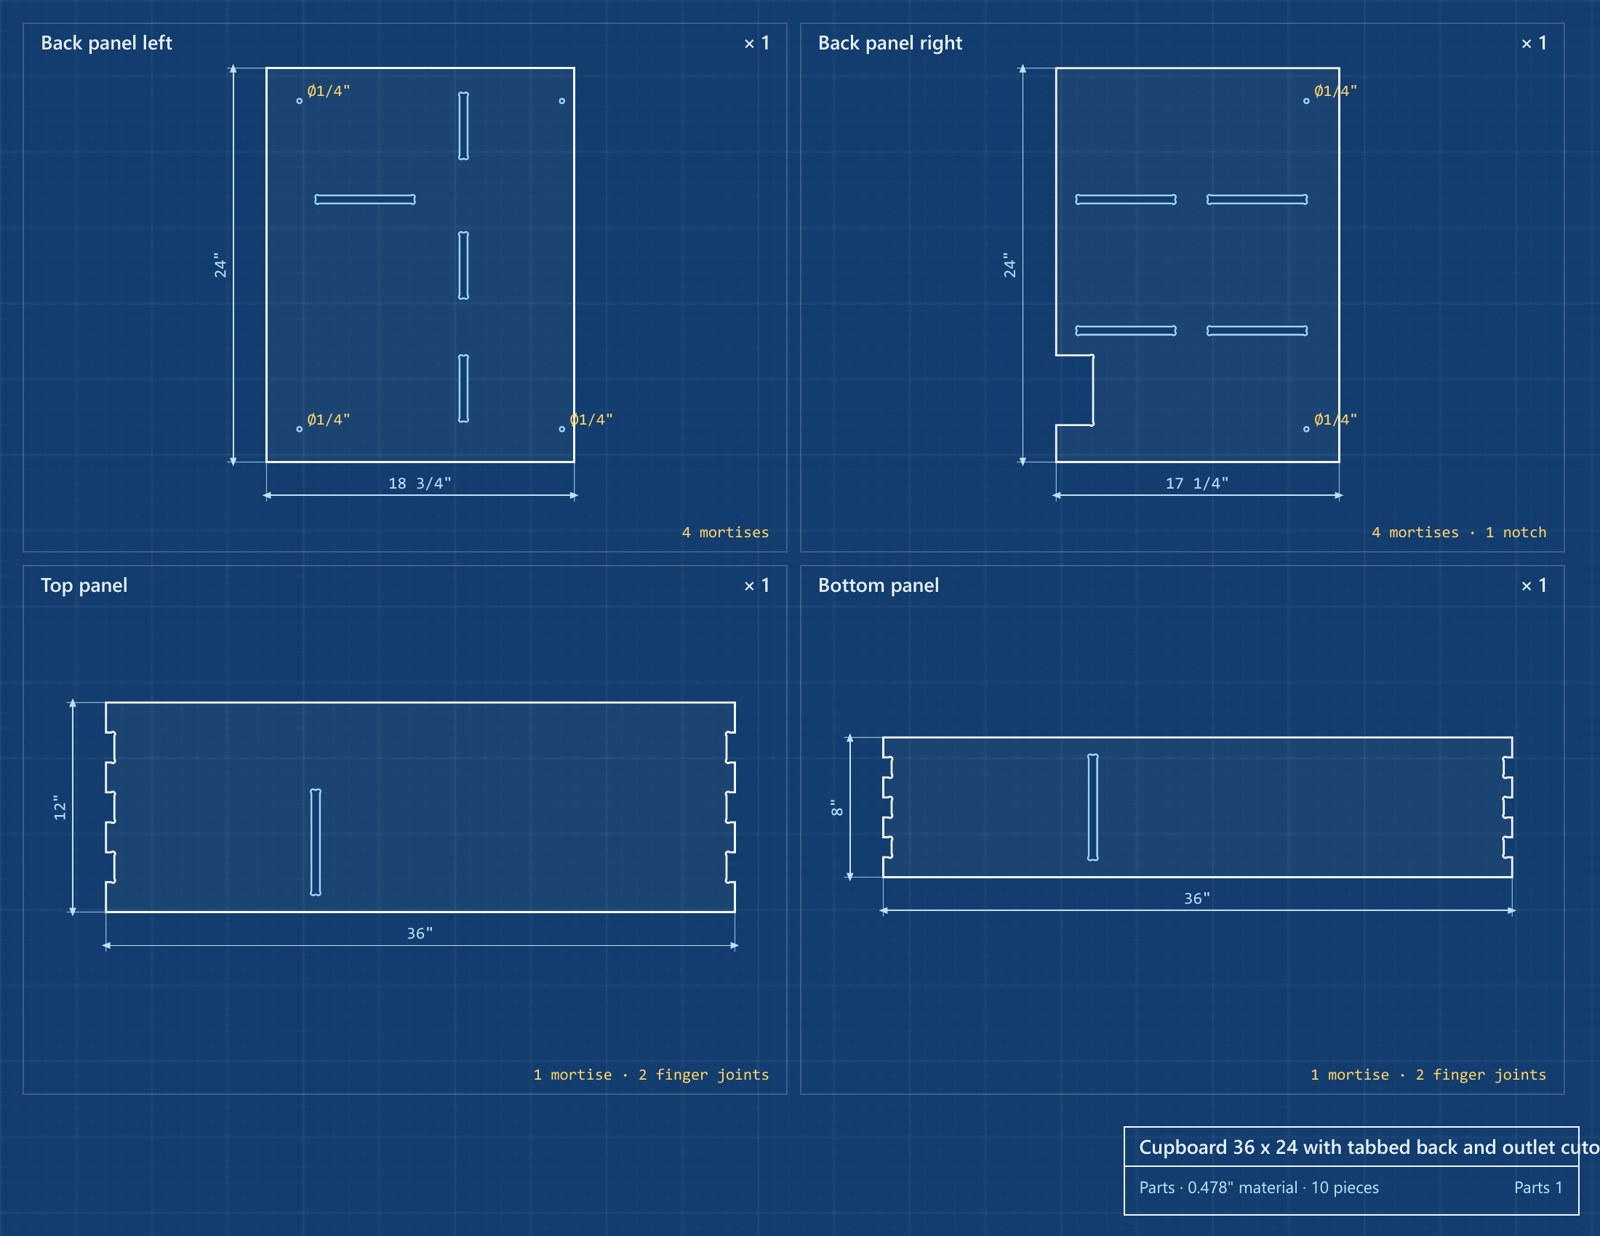
Finger joints join the sides to the top and bottom. The divider's tabs push through mortises in the top and bottom, and the shelves tab into the sides and divider. The back is two panels with mortises for those tabs, and a notch in the right panel clears a wall outlet.
Hardware
- Wood glue
- 1 in brad nails or #6 × 3/4 in screws to fix the back to the top, bottom and sides
Assembly
- Dry fit everything first.
- Glue the sides to the top and bottom panels with the finger joints. Leave the divider out for now.
- Push the divider's top and bottom tabs through the top and bottom panel mortises.
G-code, sheet 1 (.nc)G-code, sheet 2 (.nc)Open the plans (PDF)
Made for an Apprentice 404 with a 1/4 in bit. Check it in your own CAM and air-cut it before cutting.
Built in the shop
 On the machine
 Parts off the sheet
 Finished
Photos of the real build. Some backgrounds were touched up; the machine, parts and cupboard are unedited.
